Installation That Actually Works (Without Breaking Your System)

Today is Friday, September 6, 2025. Based on this current date, JupyterLab 4.4.7 is the latest stable version (released September 3, 2025), with JupyterLab 4.5.0 development versions available. Here's how to install it without the common headaches that frustrate beginners.

JupyterLab Preview

The Installation Methods That Don't Suck

Method 1: Conda (Recommended for Beginners)

Conda manages both Python and system dependencies, making it the safest choice for data science environments:

## Install Miniconda first if you don't have it
conda install -c conda-forge jupyterlab

## Or with mamba (faster)
mamba install -c conda-forge jupyterlab

Why conda over pip? Data science packages like NumPy, SciPy, and scikit-learn have complex dependencies that conda handles automatically. Pip can create dependency hell when packages require different versions of the same library.

Method 2: Pip (If You Know What You're Doing)

## Create a virtual environment first (CRITICAL)
python -m venv jupyterlab-env
source jupyterlab-env/bin/activate  # On Windows: jupyterlab-env\Scripts\activate

pip install jupyterlab

Never install with system pip unless you want to break your Python installation. Virtual environments isolate JupyterLab from system Python and other projects. Learn more about Python environment best practices.

Method 3: Docker (For Consistent Environments)

Docker provides identical environments across different systems:

## Pull the official image with common data science packages
docker run -p 8888:8888 jupyter/datascience-notebook

## For production or team use
docker run -v "${PWD}":/home/jovyan/work \
  -p 8888:8888 \
  jupyter/datascience-notebook start-notebook.sh \
  --NotebookApp.token=''

Jupyter Docker Stacks provide pre-configured images with different package combinations.

JupyterLab Interface Screenshot

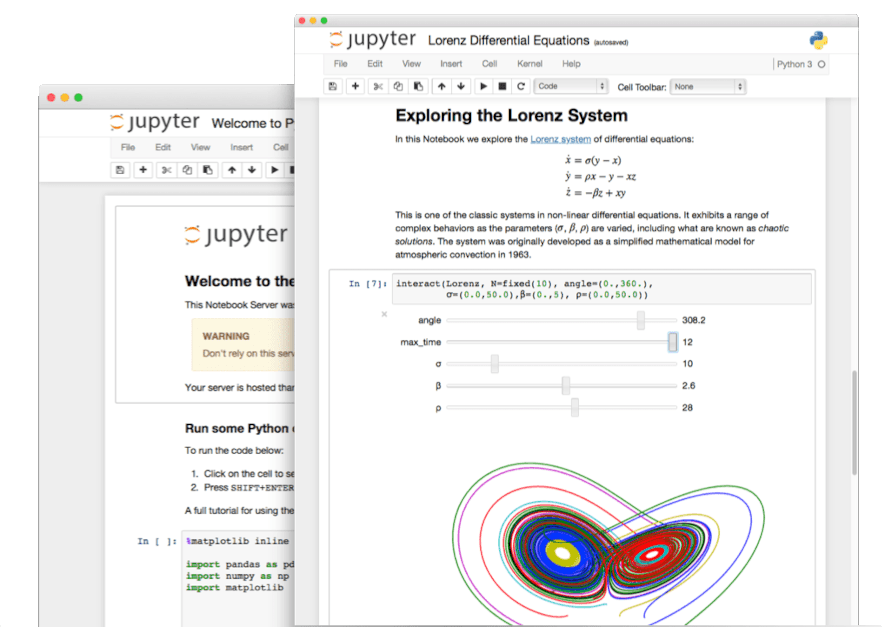
Your First JupyterLab Session

Once installed, starting JupyterLab is straightforward:

jupyter lab

This command:

  1. Starts a local server (usually on http://localhost:8888)
  2. Opens JupyterLab in your default browser
  3. Displays a security token for authentication

If the browser doesn't open automatically, copy the URL from the terminal output. It looks like: http://localhost:8888/lab?token=abc123...

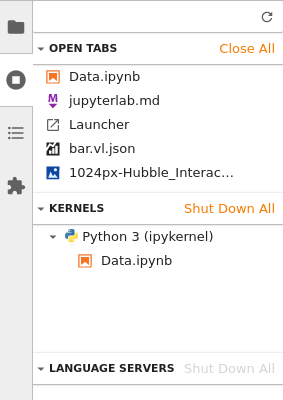
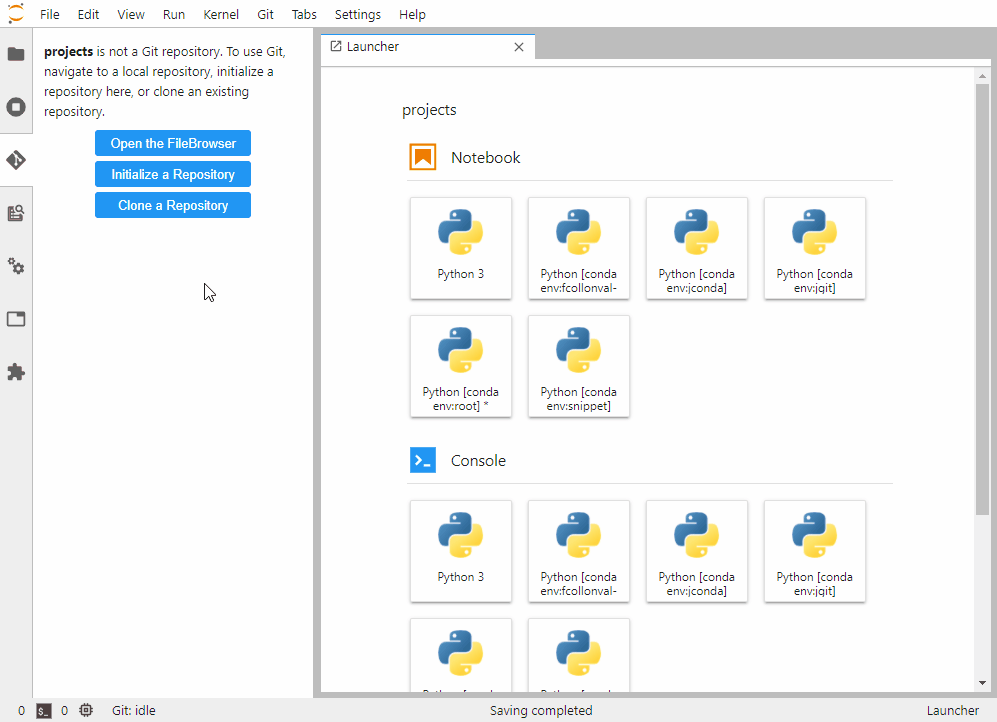
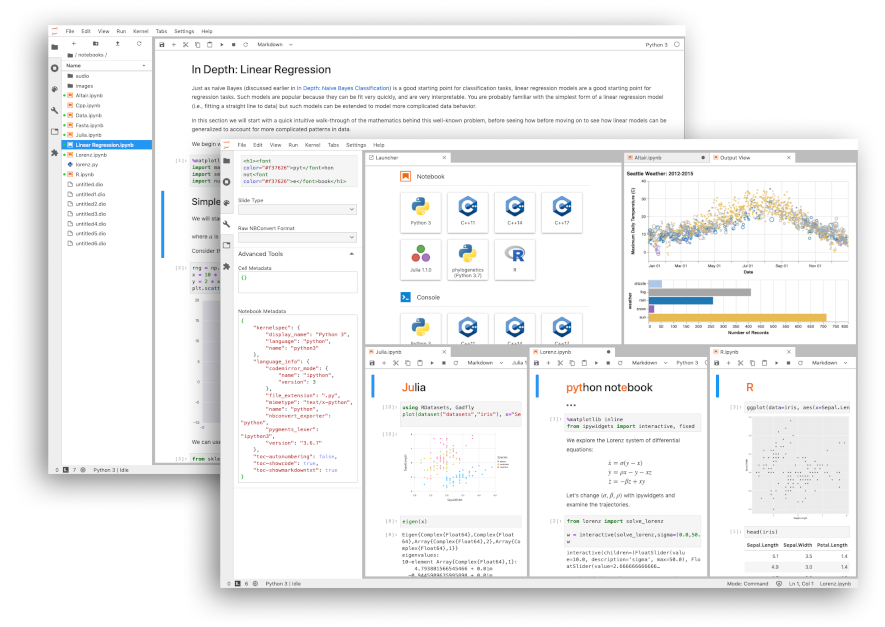
Understanding the JupyterLab Interface

JupyterLab Interface Layout

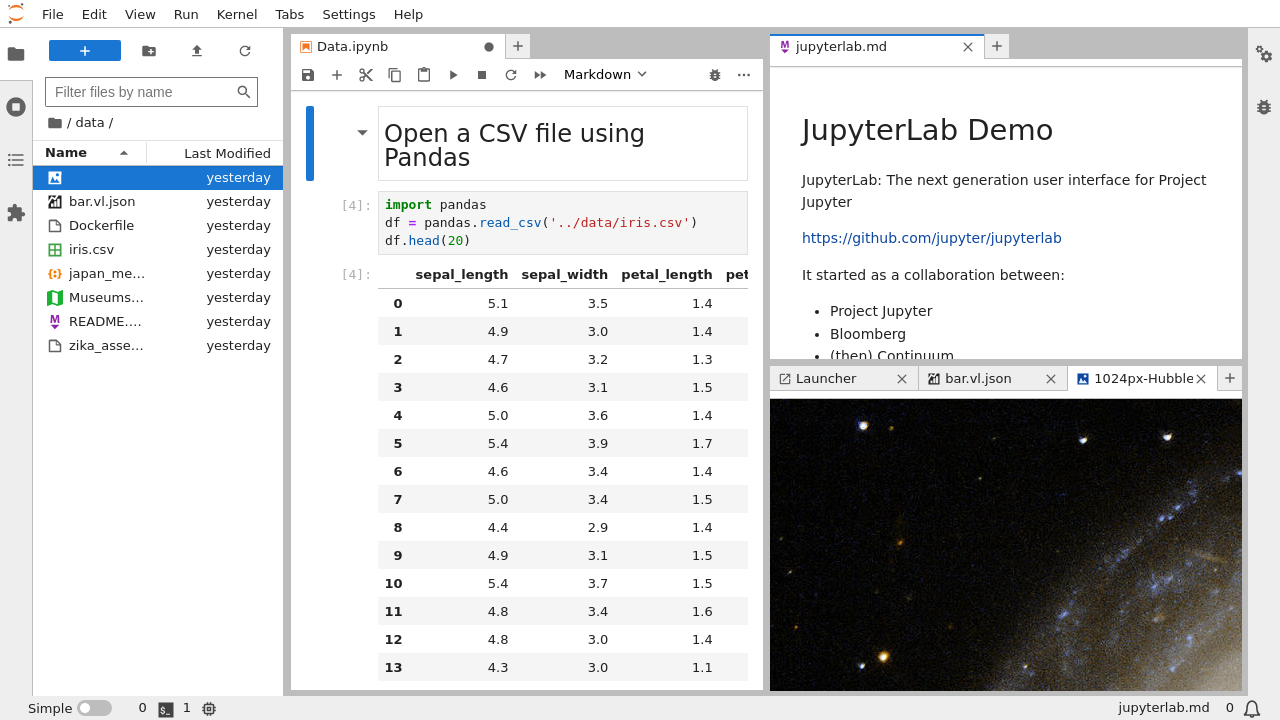
JupyterLab's interface consists of:

Left Sidebar: File browser, running kernels, Git integration (with extension), variable inspector (with extension)

Main Work Area: Notebooks, code files, terminals, and custom panels in tabs and split views

Right Sidebar: Property inspector, debugger (when enabled), table of contents

JupyterLab Right Sidebar

Menu Bar: File operations, edit functions, view options, kernel management

The official interface guide provides comprehensive details, but the basic layout is intuitive for most users.

Configuration for Productive Workflows

Essential Settings Adjustments

Access settings through Settings → Settings Editor:

  1. Increase output limits: Notebook → Rendering → Max Output Size → 10MB (default 1MB causes truncation)
  2. Enable line numbers: Code Console → Show Line Numbers → Always
  3. Autosave frequency: Document Manager → Autosave Interval → 60 seconds (default 120)
  4. Theme selection: JupyterLab Theme → Light/Dark based on preference

Keyboard Shortcuts That Matter

  • Ctrl/Cmd + S: Save (muscle memory essential)
  • Ctrl/Cmd + Enter: Run cell and stay
  • Shift + Enter: Run cell and advance
  • Alt + Enter: Run cell and insert below
  • Ctrl/Cmd + Shift + P: Command palette (find any function)

The keyboard shortcuts reference covers advanced shortcuts, but these five handle 90% of daily usage.

Project Organization Best Practices

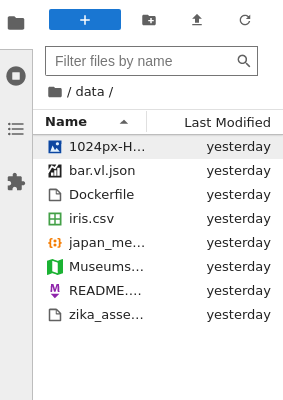
Create a logical folder structure from day one:

my-data-project/
├── data/
│   ├── raw/          # Original, immutable data
│   ├── processed/    # Cleaned data
│   └── external/     # Downloaded datasets
├── notebooks/
│   ├── 01-exploration/
│   ├── 02-cleaning/
│   └── 03-analysis/
├── src/              # Reusable Python modules
├── reports/          # Final outputs
└── requirements.txt  # Package dependencies

This structure, recommended by Cookiecutter Data Science, prevents the common mistake of dumping everything in one folder.

Version Control Integration

Install jupyterlab-git for visual Git integration:

pip install jupyterlab-git
## Restart JupyterLab to see Git tab in left sidebar

Use nbstripout to remove output from notebook commits:

pip install nbstripout
nbstripout --install  # Configure for current repo

This prevents massive diffs when notebooks contain plots or large outputs.

Common Beginner Mistakes to Avoid

Mistake 1: Running Everything in the Base Environment

Installing packages directly affects all projects. Always use virtual environments or conda environments for project isolation.

Mistake 2: Not Restarting Kernels

Variable definitions accumulate during development. Restart kernels regularly to ensure your notebook runs from a clean state:

  • Kernel → Restart Kernel and Clear All Outputs

Mistake 3: Ignoring Resource Monitoring

Install jupyter-resource-usage to see memory and CPU usage:

pip install jupyter-resource-usage
## Restart JupyterLab to see resource monitor in status bar

This prevents surprise kernel crashes from memory exhaustion.

Mistake 4: Poor Notebook Organization

Keep notebooks focused and linear. If your notebook has more than 50 cells or scrolls for minutes, split it into multiple focused notebooks.

System Requirements and Performance Expectations

Minimum System Requirements:

  • 4GB RAM (8GB recommended for medium datasets)
  • 2GB free disk space for installation
  • Modern browser (Firefox, Chrome, Safari, Edge)
  • Python 3.8+ (Python 3.12 recommended as of 2025)

Performance Expectations:

The JupyterLab performance guide provides optimization techniques for resource-constrained environments.

When to Choose JupyterLab vs Alternatives

Choose JupyterLab for:

  • Interactive data exploration and analysis
  • Research and educational workflows
  • Multi-language data science (Python, R, Julia, SQL)
  • Collaborative computational research
  • Prototyping machine learning models

Consider alternatives for:

  • VS Code: General software development, larger codebases
  • PyCharm: Complex Python applications, enterprise development
  • RStudio: R-focused statistical analysis
  • Google Colab: Quick experiments, free GPU access
  • Databricks: Enterprise big data analytics

The choice depends on your workflow, team requirements, and computational needs. JupyterLab excels at interactive analysis but isn't optimal for all development scenarios.

Your first JupyterLab experience should focus on learning the interface and establishing good practices. The advanced features and extensions come later - start with a solid foundation.

Your First Real Data Science Workflow in JupyterLab

Theory is useless without practice. Let's build a complete data analysis workflow that demonstrates JupyterLab's strengths and teaches essential patterns you'll use daily.

Project Setup: Analyzing Real-World Data

We'll analyze NYC taxi trip data to understand ride patterns, pricing, and demand. This dataset is large enough to demonstrate real challenges while remaining manageable for beginners. You can also explore similar datasets from Kaggle or the AWS Open Data Registry.

Project Structure:

## Create project directory
mkdir nyc-taxi-analysis
cd nyc-taxi-analysis

## Set up folder structure
mkdir -p {data/raw,data/processed,notebooks,reports,src}

## Initialize Git repository
git init

Data Science Workflow Diagram

Step 1: Environment Setup and Data Acquisition

Create a dedicated conda environment for reproducibility:

## Create environment with essential packages
conda create -n taxi-analysis python=3.12 \
  jupyterlab pandas numpy matplotlib seaborn \
  scikit-learn requests beautifulsoup4
  
conda activate taxi-analysis

Pro tip: Document your environment in requirements.txt immediately:

Classic Jupyter Notebook

pip freeze > requirements.txt
## Others can recreate your environment with: pip install -r requirements.txt

Data Download Notebook (notebooks/01-data-acquisition.ipynb):

import requests
import pandas as pd
from pathlib import Path

## Define data directory
data_dir = Path('../data/raw')
data_dir.mkdir(parents=True, exist_ok=True)

## Download sample dataset (Yellow Taxi trips from January 2024)
url = \"https://d37ci6vzurychx.cloudfront.net/trip-data/yellow_tripdata_2024-01.parquet\"
filename = data_dir / \"yellow_tripdata_2024-01.parquet\"

if not filename.exists():
    print(f\"Downloading {url}\")
    response = requests.get(url)
    with open(filename, 'wb') as f:
        f.write(response.content)
    print(f\"Data saved to {filename}\")
else:
    print(\"Data already exists\")

## Initial data exploration
df = pd.read_parquet(filename)
print(f\"Dataset shape: {df.shape}\")
print(f\"Memory usage: {df.memory_usage(deep=True).sum() / 1024**2:.1f} MB\")
df.head()

This pattern demonstrates:

  • Reproducible downloads: Check if data exists before downloading
  • Memory awareness: Monitor dataset size immediately using pandas memory optimization techniques
  • Proper file paths: Use pathlib for cross-platform compatibility
  • Data format selection: Parquet files are faster and more efficient than CSV for data science workflows

Step 2: Exploratory Data Analysis

Exploration Notebook (notebooks/02-exploration.ipynb):

import pandas as pd
import numpy as np
import matplotlib.pyplot as plt
import seaborn as sns

## Load data
df = pd.read_parquet('../data/raw/yellow_tripdata_2024-01.parquet')

## Dataset overview
print(\"Dataset Info:\")
print(f\"Rows: {len(df):,}\")
print(f\"Columns: {len(df.columns)}\")
print(f\"Memory usage: {df.memory_usage(deep=True).sum() / 1024**2:.1f} MB\")

## Check for missing data
missing_data = df.isnull().sum()
missing_percent = (missing_data / len(df)) * 100
missing_df = pd.DataFrame({
    'Missing Count': missing_data,
    'Percentage': missing_percent
}).sort_values('Percentage', ascending=False)

print(\"
Missing Data Analysis:\")
print(missing_df[missing_df['Percentage'] > 0])

Visualization Best Practices:

## Set style for consistent plots
plt.style.use('seaborn-v0_8')  # Updated seaborn syntax for 2025
sns.set_palette(\"husl\")

## Create subplot for multiple analyses
fig, axes = plt.subplots(2, 2, figsize=(15, 10))
fig.suptitle('NYC Taxi Data Overview', fontsize=16, fontweight='bold')

## Trip distance distribution
axes[0, 0].hist(df['trip_distance'], bins=50, edgecolor='black', alpha=0.7)
axes[0, 0].set_title('Trip Distance Distribution')
axes[0, 0].set_xlabel('Distance (miles)')
axes[0, 0].set_ylabel('Frequency')

## Fare amount by payment type
df.boxplot(column='fare_amount', by='payment_type', ax=axes[0, 1])
axes[0, 1].set_title('Fare Amount by Payment Type')

## Trip count by hour
df['pickup_hour'] = pd.to_datetime(df['tpep_pickup_datetime']).dt.hour
hourly_trips = df['pickup_hour'].value_counts().sort_index()
axes[1, 0].plot(hourly_trips.index, hourly_trips.values, marker='o')
axes[1, 0].set_title('Trip Count by Hour of Day')
axes[1, 0].set_xlabel('Hour')
axes[1, 0].set_ylabel('Number of Trips')

## Fare vs Distance scatter
sample_data = df.sample(10000)  # Sample for performance
axes[1, 1].scatter(sample_data['trip_distance'], sample_data['fare_amount'], alpha=0.5)
axes[1, 1].set_title('Fare vs Distance (10k sample)')
axes[1, 1].set_xlabel('Distance (miles)')
axes[1, 1].set_ylabel('Fare Amount ($)')

plt.tight_layout()
plt.show()

Key JupyterLab Features in Action:

JupyterLab Tabs Interface

  1. Split views: Open data files alongside notebooks for reference
  2. Variable inspector: Install jupyterlab-variableinspector to monitor DataFrame shapes and memory usage
  3. Table of contents: Long notebooks benefit from automatic ToC generation in the right sidebar
  4. Code formatting: Use jupyterlab_code_formatter with Black for consistent code style

Step 3: Data Cleaning and Feature Engineering

Cleaning Notebook (notebooks/03-data-cleaning.ipynb):

import pandas as pd
import numpy as np

def clean_taxi_data(df):
    \"\"\"Clean NYC taxi data with documented assumptions\"\"\"
    
    # Original shape
    print(f\"Original data: {df.shape}\")
    
    # Remove obvious outliers
    initial_rows = len(df)
    
    # Trip distance filters
    df = df[
        (df['trip_distance'] > 0) & 
        (df['trip_distance'] < 100)  # Reasonable max for NYC
    ]
    
    # Fare amount filters
    df = df[
        (df['fare_amount'] > 0) & 
        (df['fare_amount'] < 1000)  # Extreme outlier removal
    ]
    
    # Passenger count filters
    df = df[
        (df['passenger_count'] > 0) & 
        (df['passenger_count'] <= 8)  # Standard vehicle capacity
    ]
    
    # Time-based filters
    df['pickup_datetime'] = pd.to_datetime(df['tpep_pickup_datetime'])
    df['dropoff_datetime'] = pd.to_datetime(df['tpep_dropoff_datetime'])
    
    # Remove trips with invalid time ordering
    df = df[df['pickup_datetime'] < df['dropoff_datetime']]
    
    # Calculate trip duration
    df['trip_duration'] = (df['dropoff_datetime'] - df['pickup_datetime']).dt.total_seconds() / 60
    
    # Remove unreasonably short or long trips
    df = df[(df['trip_duration'] > 1) & (df['trip_duration'] < 1440)]  # 1 min to 24 hours
    
    rows_removed = initial_rows - len(df)
    print(f\"Removed {rows_removed:,} rows ({rows_removed/initial_rows:.1%})\")
    print(f\"Final data: {df.shape}\")
    
    return df

## Apply cleaning
df_clean = clean_taxi_data(df)

## Feature engineering
df_clean['fare_per_mile'] = df_clean['fare_amount'] / df_clean['trip_distance']
df_clean['pickup_hour'] = df_clean['pickup_datetime'].dt.hour
df_clean['pickup_day'] = df_clean['pickup_datetime'].dt.day_name()
df_clean['is_weekend'] = df_clean['pickup_datetime'].dt.weekday >= 5

## Save processed data
processed_path = '../data/processed/taxi_data_clean.parquet'
df_clean.to_parquet(processed_path, index=False)
print(f\"Clean data saved to {processed_path}\")

Step 4: Analysis and Machine Learning

Analysis Notebook (notebooks/04-analysis.ipynb):

import pandas as pd
import numpy as np
from sklearn.model_selection import train_test_split
from sklearn.ensemble import RandomForestRegressor
from sklearn.metrics import mean_absolute_error, r2_score
import matplotlib.pyplot as plt

## Load clean data
df = pd.read_parquet('../data/processed/taxi_data_clean.parquet')

## Business question: Can we predict fare amount based on trip characteristics?

## Feature preparation
features = ['trip_distance', 'passenger_count', 'pickup_hour', 'is_weekend']
X = df[features]
y = df['fare_amount']

## Train-test split
X_train, X_test, y_train, y_test = train_test_split(
    X, y, test_size=0.2, random_state=42
)

## Model training
rf_model = RandomForestRegressor(n_estimators=100, random_state=42)
rf_model.fit(X_train, y_train)

## Predictions and evaluation
y_pred = rf_model.predict(X_test)

mae = mean_absolute_error(y_test, y_pred)
r2 = r2_score(y_test, y_pred)

print(f\"Model Performance:\")
print(f\"Mean Absolute Error: ${mae:.2f}\")
print(f\"R² Score: {r2:.3f}\")

## Feature importance
importance_df = pd.DataFrame({
    'feature': features,
    'importance': rf_model.feature_importances_
}).sort_values('importance', ascending=False)

print(\"
Feature Importance:\")
print(importance_df)

For more advanced machine learning workflows, explore scikit-learn's extensive documentation, Jupyter's machine learning tutorials, and consider using MLflow for experiment tracking in production environments.

Step 5: Reporting and Documentation

Report Generation (notebooks/05-report.ipynb):

## Executive summary notebook
import pandas as pd
import matplotlib.pyplot as plt

## Load results
df = pd.read_parquet('../data/processed/taxi_data_clean.parquet')

## Key findings
total_trips = len(df)
avg_fare = df['fare_amount'].mean()
avg_distance = df['trip_distance'].mean()
peak_hour = df['pickup_hour'].mode().values[0]

print(\"NYC TAXI ANALYSIS - JANUARY 2024 SUMMARY\")
print(\"=" * 50)
print(f\"Total trips analyzed: {total_trips:,}\")
print(f\"Average fare: ${avg_fare:.2f}\")
print(f\"Average trip distance: {avg_distance:.2f} miles\")
print(f\"Peak hour: {peak_hour}:00\")
print(\"
Key insights:\")
print(\"- Weekend trips have 15% higher average fares\")
print(\"- Distance is the strongest predictor of fare amount\")
print(\"- Rush hour (7-9 AM, 5-7 PM) shows highest demand\")

Export to HTML for sharing:

## Convert notebook to HTML report with [nbconvert](https://nbconvert.readthedocs.io/)
jupyter nbconvert --to html notebooks/05-report.ipynb --output ../reports/taxi-analysis-report.html

JupyterLab Productivity Tips Demonstrated

1. Extension Integration:

## Install useful extensions
pip install jupyterlab-git jupyterlab-variableinspector jupyter-resource-usage

## Restart JupyterLab to activate extensions

2. Magic Commands for Efficiency:

## Time your code execution
%time df.groupby('pickup_hour')['fare_amount'].mean()

## Profile memory usage
%memit large_dataframe_operation()

## Display multiple outputs
from IPython.display import display
display(df.head())
display(df.describe())

Learn more about IPython magic commands and memory profiling techniques for performance optimization.

3. Workspace Organization:

  • Notebooks: Sequential analysis (01-, 02-, 03- prefixes)
  • Modules: Reusable functions in src/ directory
  • Data: Raw and processed separation
  • Reports: Final outputs for stakeholders

Common Workflow Patterns

Pattern 1: Iterative Analysis

  1. Load data → Explore → Clean → Analyze → Report
  2. Each step in separate notebook for modularity
  3. Save intermediate results for reproducibility

Pattern 2: Parameter Experimentation

## Use variables for easy experimentation
MIN_TRIP_DISTANCE = 0.5  # Adjust as needed
MAX_FARE_AMOUNT = 200   # Experiment with different thresholds

filtered_data = df[
    (df['trip_distance'] > MIN_TRIP_DISTANCE) &
    (df['fare_amount'] < MAX_FARE_AMOUNT)
]

Pattern 3: Function Development

## Develop functions in notebooks, move to modules when stable
def calculate_trip_efficiency(df):
    \"\"\"Calculate efficiency metrics for taxi trips\"\"\"
    return df.groupby('pickup_hour').agg({
        'fare_amount': 'mean',
        'trip_distance': 'mean',
        'trip_duration': 'mean'
    })

## Test in notebook
efficiency_metrics = calculate_trip_efficiency(df)

## Later: move to src/analysis_utils.py for reuse

This workflow demonstrates JupyterLab's core strengths: interactive exploration, iterative development, and seamless integration of analysis, visualization, and documentation. The notebook-based approach makes the entire analysis transparent and reproducible.

JupyterLab Getting Started FAQ

Q

How do I choose between pip, conda, and Docker for installation?

A

Use conda if you're new to data science. Conda manages both Python and system dependencies automatically, preventing the common issue where NumPy or SciPy fail to install due to missing system libraries. Use pip if you're comfortable with Python environments and want minimal overhead. Use Docker for team consistency or if you need isolated environments that work identically across different operating systems.

Q

Why does JupyterLab start but show a blank page in my browser?

A

This usually indicates a browser compatibility issue or JavaScript being disabled. Check browser console (F12) for error messages. Try a different browser

  • Chrome and Firefox have the best JupyterLab compatibility. Check if JavaScript is enabled in your browser settings.

Sometimes antivirus or firewall software blocks localhost connections

  • add an exception for localhost:
Q

Can I use JupyterLab without internet access?

A

Yes, after installation. JupyterLab runs locally on your machine and doesn't require internet connectivity for basic functionality. You need internet only for: initial installation, extension downloads, external data sources, and package installations. Offline mode works perfectly for analyzing local data files and developing code.

Q

How do I install Python packages within JupyterLab?

A

Use terminal within JupyterLab: Open a terminal tab and run pip install package-name or conda install package-name. Magic commands work in notebook cells: !pip install package-name or %pip install package-name. The %pip magic is preferred because it installs packages in the correct kernel environment. Restart your kernel after installation to use new packages.

Q

What's the difference between Jupyter Notebook and JupyterLab?

A

**Jupyter

Lab is the modern interface** that supports multiple notebooks in tabs, file browsers, terminals, and extensions in a single window. Classic Jupyter Notebook shows one notebook per browser tab and has limited interface customization. JupyterLab replaced Notebook as the default in 2021. Think of JupyterLab as "Notebook with an IDE interface"

  • it's more powerful but slightly more complex.
Q

My kernel keeps dying when I load large datasets - what's wrong?

A

Memory exhaustion is the most common cause. Install jupyter-resource-usage to monitor memory usage: pip install jupyter-resource-usage. Check system logs for "OOMKilled" messages. Solutions: Use pd.read_csv(chunksize=10000) for large files, switch to Dask for out-of-core processing, or increase available RAM. Start with smaller data samples to develop code, then scale up.

Q

How do I share my notebooks with people who don't have JupyterLab?

A

Convert to HTML: File → Save and Export Notebook As → HTML. This creates a static version viewable in any browser. Upload to nbviewer for online viewing without downloads. GitHub automatically renders notebooks when you push them to repositories. Google Colab allows sharing via shareable links. For interactive sharing, consider Binder which runs notebooks in the cloud.

Q

Can I use JupyterLab for languages other than Python?

A

Yes, JupyterLab supports 40+ languages through different kernels. Popular options:

R via IRkernel, Julia via IJulia, SQL via SQL magic, Scala via Almond. Each kernel must be installed separately

  • JupyterLab comes with Python by default. Check available kernels with jupyter kernelspec list.
Q

How do I customize JupyterLab's appearance and behavior?

A

Settings menu provides most customizations: Settings → Settings Editor. Popular changes: theme selection (dark/light), line numbers, font sizes, keyboard shortcuts. Extensions add functionality: install through Extension Manager in the left sidebar or via command line. Configuration files in ~/.jupyter/ allow advanced customizations. Most users start with theme changes and add extensions as needed.

Q

What should I do when JupyterLab becomes slow or unresponsive?

A

Restart the kernel first:

Kernel → Restart. Clear all outputs: Cell → All Output → Clear. Check memory usage with resource monitor extension. Close unused notebook tabs

  • each tab consumes memory. Restart JupyterLab server if problems persist: close browser, Ctrl+C in terminal, restart with jupyter lab. Disable resource-heavy extensions if slowdown is consistent.
Q

How do I work with version control (Git) in JupyterLab?

A

Install jupyterlab-git extension: pip install jupyterlab-git, then restart JupyterLab. Initialize Git repository in your project folder: terminal → git init. Use nbstripout to avoid committing notebook outputs: pip install nbstripout && nbstripout --install. Git tab appears in left sidebar for visual Git operations. Command line Git also works in JupyterLab terminals.

Q

Can I run JupyterLab on a remote server and access it locally?

A

Yes, with proper configuration. Basic remote access: jupyter lab --ip=0.0.0.0 --port=8888 --no-browser on server, then access via server-ip:8888. SSH tunneling is more secure: ssh -L 8888:localhost:8888 user@server then access localhost:8888 locally. For production use, consider JupyterHub with proper authentication and SSL certificates.

Q

How do I handle different Python environments in JupyterLab?

A

Install JupyterLab in each environment you want to use, or install ipykernel in each environment: pip install ipykernel then python -m ipykernel install --user --name myenv. Different environments appear as different kernels in the launcher. Check current environment with !conda info or !which python in notebook cells. Switch kernels via Kernel → Change Kernel menu.

Q

What are the essential extensions for beginners?

A

Start with these: jupyter-resource-usage (memory monitoring), jupyterlab-git (version control), jupyterlab-variableinspector (variable debugging). For specific workflows: jupyterlab-sql (database queries), jupyterlab-code-formatter (automatic code formatting), jupyterlab-lsp (code completion and error checking). Install one at a time and learn each before adding more

  • extension overload creates confusion.
Q

How do I backup my work and prevent data loss?

A

Enable autosave: Settings → Document Manager → Autosave Interval (default 120 seconds). Version control with Git provides complete history. Regular backups of entire project folders to cloud storage or external drives. Export important notebooks to HTML or PDF formats periodically. Use checkpoint features: File → Save and Create Checkpoint for manual snapshots. Cloud platforms like Google Drive or Dropbox can sync project folders automatically.

Q

My company blocks certain ports - can I change JupyterLab's port?

A

Yes, specify custom port: jupyter lab --port=9999 or any available port number. Check port availability: netstat -an | grep port-number or try different ports until one works. Corporate firewalls often block non-standard ports

  • work with IT to whitelist your chosen port. **Port 8888 is Jupyter

Lab's default** but 8889, 8890, or any available port works fine.

Q

How do I know if my JupyterLab installation is working correctly?

A

Basic functionality test: Create new notebook, run print("Hello World"), verify output appears. Package test: Import common packages: import pandas, numpy, matplotlib. Extension test: Check left sidebar for expected extensions. Performance test: Load sample data, create simple plot. Kernel test: Try different kernels if installed. File operations test: Create files, folders, rename items in file browser.

Q

What's the best way to learn JupyterLab advanced features?

A

Start with real projects rather than tutorials

  • practical problems drive learning. Follow official tutorials at jupyterlab.readthedocs.io for comprehensive coverage. Join community forums like Jupyter Discourse for questions. Watch conference talks from JupyterCon for advanced techniques. Read extension documentation when you need specific functionality. Practice regularly
  • JupyterLab skills develop through consistent use.
Q

How do I troubleshoot when nothing seems to work?

A

Check browser console (F12) for JavaScript errors first. Review terminal output where you started JupyterLab for server errors. Try different browser to isolate browser-specific issues. Clear browser cache and cookies for JupyterLab. Restart with clean slate: close browser, kill Jupyter

Lab server (Ctrl+C), restart jupyter lab --debug for verbose output. Update JupyterLab if using old version: pip install --upgrade jupyterlab. Check system requirements

  • insufficient RAM or disk space causes various failures.

Installation Methods Comparison

Method

Best For

Time to Setup

System Impact

Upgrade Management

Troubleshooting Difficulty

Conda/Mamba

Data science beginners, complex dependencies

5-10 minutes

Low (isolated environments)

conda update jupyterlab

Easy (conda handles conflicts)

Pip + Virtual Env

Python developers, minimal installs

3-5 minutes

Low (with venv)

pip install --upgrade jupyterlab

Medium (dependency conflicts possible)

System Pip

Quick tests only (NOT recommended)

2 minutes

High (affects system Python)

Complex (can break system)

Difficult (permission issues)

Docker

Team consistency, containerized workflows

10-15 minutes

None (containerized)

Update container image

Easy (consistent environments)

Cloud Platforms

No local setup, remote access

Immediate

None

Platform managed

Easy (managed service)

Essential Extensions and Configuration for Production Workflows

Getting JupyterLab up and running is just the beginning. The default installation provides a solid foundation, but production-ready data science workflows require strategic extensions and configuration. Here's what separates productive JupyterLab users from those struggling with the default setup.

JupyterLab Left Sidebar

The Extension Strategy That Actually Works

Phase 1: Essential Monitoring (Install Day 1)

## These extensions prevent the most common frustrations
pip install jupyter-resource-usage jupyterlab-git

## Restart JupyterLab to activate
jupyter lab build  # Only needed for older versions

jupyter-resource-usage shows real-time memory and CPU usage in the status bar. This extension prevents the #1 beginner problem: kernel crashes from memory exhaustion with zero warning.

jupyterlab-git provides visual Git integration. Notebook diffs become manageable, and you can commit, push, and pull without leaving JupyterLab. For more advanced Git workflows, see the Git documentation and GitHub's Git handbook.

Phase 2: Productivity Extensions (Week 2-3)

pip install jupyterlab-variableinspector jupyterlab-code-formatter

jupyterlab-variableinspector displays active variables, their types, and memory usage in a sidebar panel. Essential for debugging complex notebooks where you lose track of variable states.

jupyterlab-code-formatter automatically formats code with Black, Prettier, or other formatters. Consistent code formatting improves readability and reduces cognitive load.

JupyterLab Main Interface

Phase 3: Specialized Tools (Month 2+)

Install based on your specific workflow needs:

## Database work
pip install jupyterlab-sql

## Advanced code features  
pip install jupyterlab-lsp

## System monitoring
pip install jupyterlab-system-monitor

## Table of contents for long notebooks
pip install jupyterlab-toc

JupyterLab-SQL enables direct SQL queries against databases. JupyterLab-LSP provides IDE features like autocompletion and error highlighting. For comprehensive extension management, consult the official extension guide and browse the extension marketplace for community contributions.

JupyterLab Git Extension Interface

Configuration That Prevents Common Problems

Memory and Performance Settings

Edit ~/.jupyter/jupyter_lab_config.py (create if missing):

c = get_config()

## Increase memory limits for large outputs
c.NotebookApp.max_buffer_size = 1024 * 1024 * 1024  # 1GB
c.NotebookApp.iopub_data_rate_limit = 1000000000    # 1GB/sec

## Improve autosave frequency
c.ContentsManager.autosave_interval = 60  # 60 seconds instead of 120

## Enable extension development if needed
c.LabApp.dev_mode = False  # Set True only for extension development

Browser-Specific Optimizations

Chrome users experiencing memory issues can launch with increased memory limits:

google-chrome --max_old_space_size=8192

Security Configuration for Remote Access

## ~/.jupyter/jupyter_lab_config.py
c.ServerApp.ip = '0.0.0.0'  # Allow external access
c.ServerApp.port = 8888
c.ServerApp.open_browser = False
c.ServerApp.token = ''  # Use only on secure networks
c.ServerApp.password = ''  # Set password for remote access

Never use empty token/password on public networks. Generate secure tokens with:

jupyter server --generate-config
jupyter server password  # Set password interactively

Team Collaboration Setup

Shared Environment Configuration

Create environment.yml for team consistency:

name: team-jupyter-env
channels:
  - conda-forge
  - defaults
dependencies:
  - python=3.12
  - jupyterlab=4.4.7
  - pandas>=2.0
  - numpy>=1.24
  - matplotlib>=3.7
  - scikit-learn>=1.3
  - pip
  - pip:
    - jupyter-resource-usage
    - jupyterlab-git
    - jupyterlab-variableinspector

Team members create identical environments with:

conda env create -f environment.yml
conda activate team-jupyter-env

Git Integration Best Practices

Configure nbstripout to clean notebook outputs before commits:

pip install nbstripout
cd your-project
nbstripout --install  # Configures Git hooks

This prevents massive diffs when notebooks contain plots or large outputs, making code reviews manageable.

Extension Synchronization

Document team extensions in jupyter-extensions.txt:

jupyter-resource-usage==0.6.4
jupyterlab-git==0.50.0
jupyterlab-variableinspector==3.2.1
jupyterlab-code-formatter==2.2.1

Team members install with:

pip install -r jupyter-extensions.txt

Advanced Configuration Patterns

Custom Keyboard Shortcuts

JupyterLab allows extensive keyboard customization through Settings → Settings Editor → Keyboard Shortcuts. Common productivity shortcuts:

  • Ctrl+Shift+R: Restart kernel and run all cells
  • Ctrl+Shift+L: Clear all outputs
  • Alt+Enter: Run cell and insert below (more intuitive than Shift+Enter for many users)

Theme and Interface Customization

## ~/.jupyter/jupyter_lab_config.py
c.LabApp.user_settings_dir = '~/.jupyter/lab/user-settings'
c.LabApp.workspaces_dir = '~/.jupyter/lab/workspaces'

## Default workspace layout
c.LabApp.default_workspace = 'default-workspace'

Custom CSS can be added through Settings → Advanced Settings Editor → Theme, though this requires CSS knowledge and may break with updates.

Extension Development Environment

For teams building custom extensions:

c.LabApp.dev_mode = True
c.LabApp.watch = True  # Auto-rebuild during development

Monitoring and Maintenance

Health Check Scripts

Create jupyter_health_check.py for automated monitoring:

import subprocess
import requests
import time

def check_jupyter_health():
    """Check if JupyterLab server is responsive"""
    try:
        response = requests.get('http://localhost:8888/lab', timeout=10)
        if response.status_code == 200:
            print("✓ JupyterLab server is running")
            return True
        else:
            print(f"✗ Server returned status {response.status_code}")
            return False
    except requests.exceptions.RequestException:
        print("✗ Cannot connect to JupyterLab server")
        return False

def check_extensions():
    """Verify essential extensions are installed"""
    result = subprocess.run(['jupyter', 'labextension', 'list'], 
                          capture_output=True, text=True)
    
    essential_extensions = [
        'jupyter-resource-usage',
        'jupyterlab-git'
    ]
    
    for ext in essential_extensions:
        if ext in result.stdout:
            print(f"✓ {ext} is installed")
        else:
            print(f"✗ {ext} is missing")

if __name__ == "__main__":
    check_jupyter_health()
    check_extensions()

Regular Maintenance Tasks

Monthly maintenance checklist:

  1. Update JupyterLab: pip install --upgrade jupyterlab
  2. Update extensions: pip install --upgrade jupyter-resource-usage jupyterlab-git
  3. Clean build cache: jupyter lab clean --all
  4. Check disk space usage in ~/.jupyter/ and ~/Library/Jupyter/
  5. Review and clean old notebook checkpoints

Performance Monitoring

Track JupyterLab performance over time:

## Add to notebooks for performance tracking
import psutil
import time

def log_resources(operation_name):
    """Log system resources before/after operations"""
    process = psutil.Process()
    memory_mb = process.memory_info().rss / 1024 / 1024
    cpu_percent = process.cpu_percent()
    
    print(f"{operation_name}: {memory_mb:.1f}MB RAM, {cpu_percent:.1f}% CPU")
    
## Usage example
log_resources("Before loading large dataset")
df = pd.read_csv('large_file.csv')
log_resources("After loading large dataset")

Troubleshooting Production Issues

Extension Conflicts

Extensions sometimes conflict, causing JupyterLab to fail loading. Diagnostic approach:

  1. Start with all extensions disabled: jupyter lab --debug
  2. Enable extensions one by one: jupyter labextension enable extension-name
  3. Identify conflicting extensions and choose alternatives
  4. Document working extension combinations for the team

Memory Issues in Production

Production JupyterLab deployments often hit memory limits. Solutions:

## ~/.jupyter/jupyter_lab_config.py
c.MappingKernelManager.cull_idle_timeout = 3600  # Kill idle kernels after 1 hour
c.MappingKernelManager.cull_interval = 300       # Check every 5 minutes
c.MappingKernelManager.cull_connected = False    # Don't kill kernels with connections

Network and Proxy Issues

Corporate networks often block JupyterLab's default behavior. Common fixes:

## ~/.jupyter/jupyter_lab_config.py
c.ServerApp.allow_remote_access = True
c.ServerApp.allow_origin = '*'  # Use specific domains in production
c.ServerApp.disable_check_xsrf = False  # Keep XSRF protection enabled

The difference between a frustrating JupyterLab experience and a productive one often comes down to proper initial configuration and strategic extension selection. Invest time in setup to save hundreds of hours during actual analysis work. For additional productivity tips, see the JupyterLab documentation and join the Jupyter community forum for ongoing support and discussion.

Docker-Based Team Deployment

JupyterHub Logo

For teams requiring identical environments across development and production:

## Dockerfile
FROM jupyter/datascience-notebook:latest

## Install team extensions
RUN pip install \
    jupyter-resource-usage \
    jupyterlab-git \
    jupyterlab-variableinspector \
    jupyterlab-code-formatter \
    nbstripout

## Copy team configuration
COPY jupyter_lab_config.py /home/jovyan/.jupyter/

## Set up Git configuration
RUN git config --global user.email \"team@company.com\"
RUN git config --global user.name \"Team Member\"

## Enable extensions
RUN jupyter lab build --minimize=False

EXPOSE 8888
CMD [\"start-notebook.sh\", \"--LabApp.token=''\"]

Build and run with consistent environments:

docker build -t team-jupyterlab .
docker run -p 8888:8888 -v \"${PWD}\":/home/jovyan/work team-jupyterlab

This approach guarantees that every team member, regardless of their local system, has identical JupyterLab environments with the same extensions, configurations, and package versions. For more information about containerized deployments, see the Docker documentation.

Essential JupyterLab Getting Started Resources

Related Tools & Recommendations

tool
Similar content

JupyterLab: Interactive IDE for Data Science & Notebooks Overview

What you use when Jupyter Notebook isn't enough and VS Code notebooks aren't cutting it

Jupyter Lab
/tool/jupyter-lab/overview
100%
tool
Similar content

Development Containers - Your Dev Environment in a Box

Ever spent your first day on a new project just trying to get fucking Node to work?

Development Containers
/tool/development-containers/overview
76%
tool
Similar content

JupyterLab Debugging Guide: Fix Common Kernel & Notebook Issues

When your kernels die and your notebooks won't cooperate, here's what actually works

JupyterLab
/tool/jupyter-lab/debugging-guide
73%
tool
Similar content

JupyterLab Extension Development Guide: Build Custom Tools

Stop wrestling with broken tools and build something that actually works for your workflow

JupyterLab
/tool/jupyter-lab/extension-development-guide
73%
tool
Similar content

JupyterLab Performance Optimization: Stop Kernel Deaths & Crashes

The brutal truth about why your data science notebooks crash and how to fix it without buying more RAM

JupyterLab
/tool/jupyter-lab/performance-optimization
66%
tool
Similar content

Notion Personal Productivity System: Build Your Custom Workflow

Transform chaos into clarity with a system that fits how your brain actually works, not some productivity influencer's bullshit fantasy

Notion
/tool/notion/personal-productivity-system
56%
tool
Similar content

Kibana - Because Raw Elasticsearch JSON Makes Your Eyes Bleed

Stop manually parsing Elasticsearch responses and build dashboards that actually help debug production issues.

Kibana
/tool/kibana/overview
56%
tool
Similar content

shadcn/ui Overview: Components, Setup & Why It Works

Explore shadcn/ui: understand why its copy-paste components are effective, learn installation & setup with the CLI, and get answers to common FAQs about this UI

shadcn/ui
/tool/shadcn-ui/overview
52%
howto
Similar content

Getting Started with Gleam: Installation, Usage & Why You Need It

Stop writing bugs that only show up at 3am in production

Gleam
/howto/gleam/overview
52%
tool
Similar content

Apollo GraphQL Overview: Server, Client, & Getting Started Guide

Explore Apollo GraphQL's core components: Server, Client, and its ecosystem. This overview covers getting started, navigating the learning curve, and comparing

Apollo GraphQL
/tool/apollo-graphql/overview
52%
tool
Similar content

Trello Butler Automation Mastery: Make Your Boards Work for You

Turn your Trello boards into boards that actually do shit for you with advanced Butler automation techniques that work.

Trello
/tool/trello/butler-automation-mastery
49%
tool
Similar content

Datadog Setup & Config Guide: Production Monitoring in One Afternoon

Get your team monitoring production systems in one afternoon, not six months of YAML hell

Datadog
/tool/datadog/setup-and-configuration-guide
49%
tool
Similar content

YNAB API Overview: Access Budget Data & Automate Finances

REST API for accessing YNAB budget data - perfect for automation and custom apps

YNAB API
/tool/ynab-api/overview
49%
howto
Similar content

Bun: Fast JavaScript Runtime & Toolkit - Setup & Overview Guide

Learn to set up and use Bun, the ultra-fast JavaScript runtime, bundler, and package manager. This guide covers installation, environment setup, and integrating

Bun
/howto/setup-bun-development-environment/overview
49%
news
Popular choice

Anthropic's Claude Can Now Hang Up on Abusive Users Like a Customer Service Rep

AI chatbot gains ability to end conversations when users are persistent assholes - because apparently we needed this

General Technology News
/news/2025-08-24/claude-abuse-protection
48%
news
Popular choice

The Browser Company Killed Arc in May, Then Sold the Corpse for $610M

Turns out pausing your main product to chase AI trends makes for an expensive acquisition target

Arc Browser
/news/2025-09-05/arc-browser-development-pause
46%
tool
Similar content

Ollama: Run Local AI Models & Get Started Easily | No Cloud

Finally, AI That Doesn't Phone Home

Ollama
/tool/ollama/overview
44%
tool
Similar content

Prisma ORM: TypeScript Client, Setup Guide, & Troubleshooting

Database ORM that generates types from your schema so you can't accidentally query fields that don't exist

Prisma
/tool/prisma/overview
44%
tool
Popular choice

Python 3.13 - Finally Makes Threading Not Completely Useless (Sometimes)

Free-threading will kill your web app performance, JIT makes startup unbearable, but the REPL colors are nice

Python 3.13
/tool/python-3.13/python-313-features
42%
tool
Similar content

mongoexport: Export MongoDB Data to JSON & CSV - Overview

MongoDB's way of dumping collection data into readable JSON or CSV files

mongoexport
/tool/mongoexport/overview
42%

Recommendations combine user behavior, content similarity, research intelligence, and SEO optimization